Previous time
Premise: Apple Developer registration has been completed.
0. Install Xcode
Let’s develop the development environment where the developer registration has been successfully completed.
As an integrated development environmentXcodeUse the. Please install from Mac App Store. As of 2015/01, the latest is 6.1.11.
1. Check out source from repository
Since Xcode has a function to check out directly from the remote repository, we will clone from Xcode. Please skip if checked out locally.
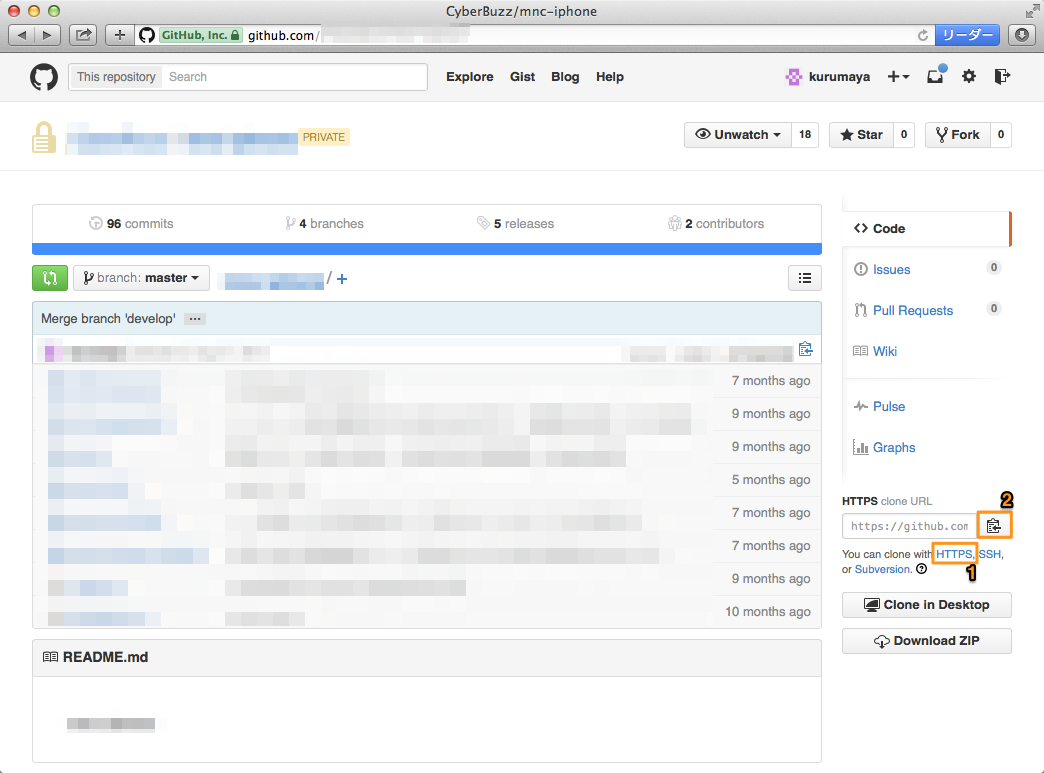
Let’s copy the URL to clone. If you are using GitHub, there is a URL in the lower right corner of the project page.
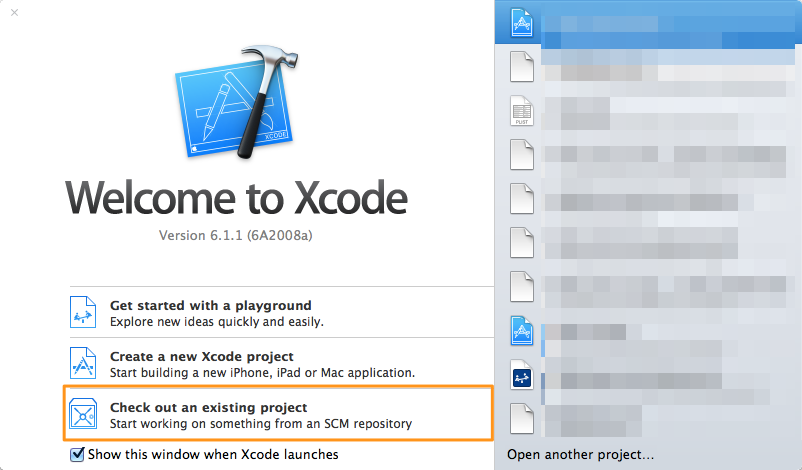
Choose Check Out.
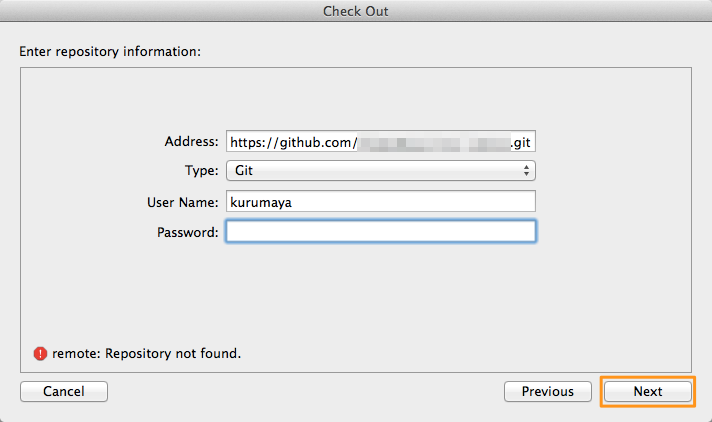
Please enter the location of the repository and press Next.
For a private repository, you need an account to access the repository, so please enter by entering the user name and password you use for GitHub login.
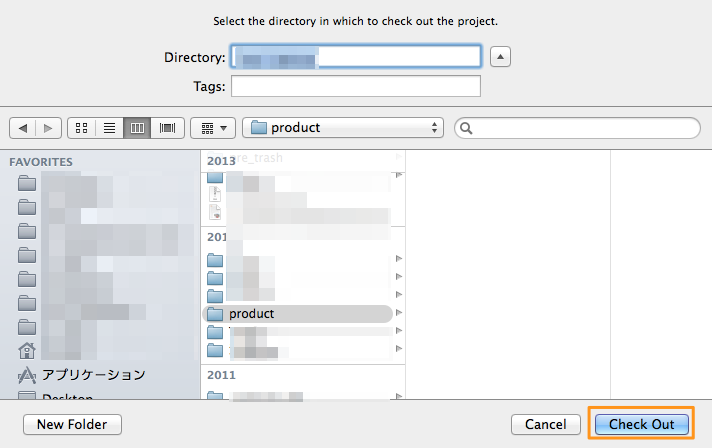
Select the branch and proceed to the next and check out to any folder.
2. Add account to Xcode
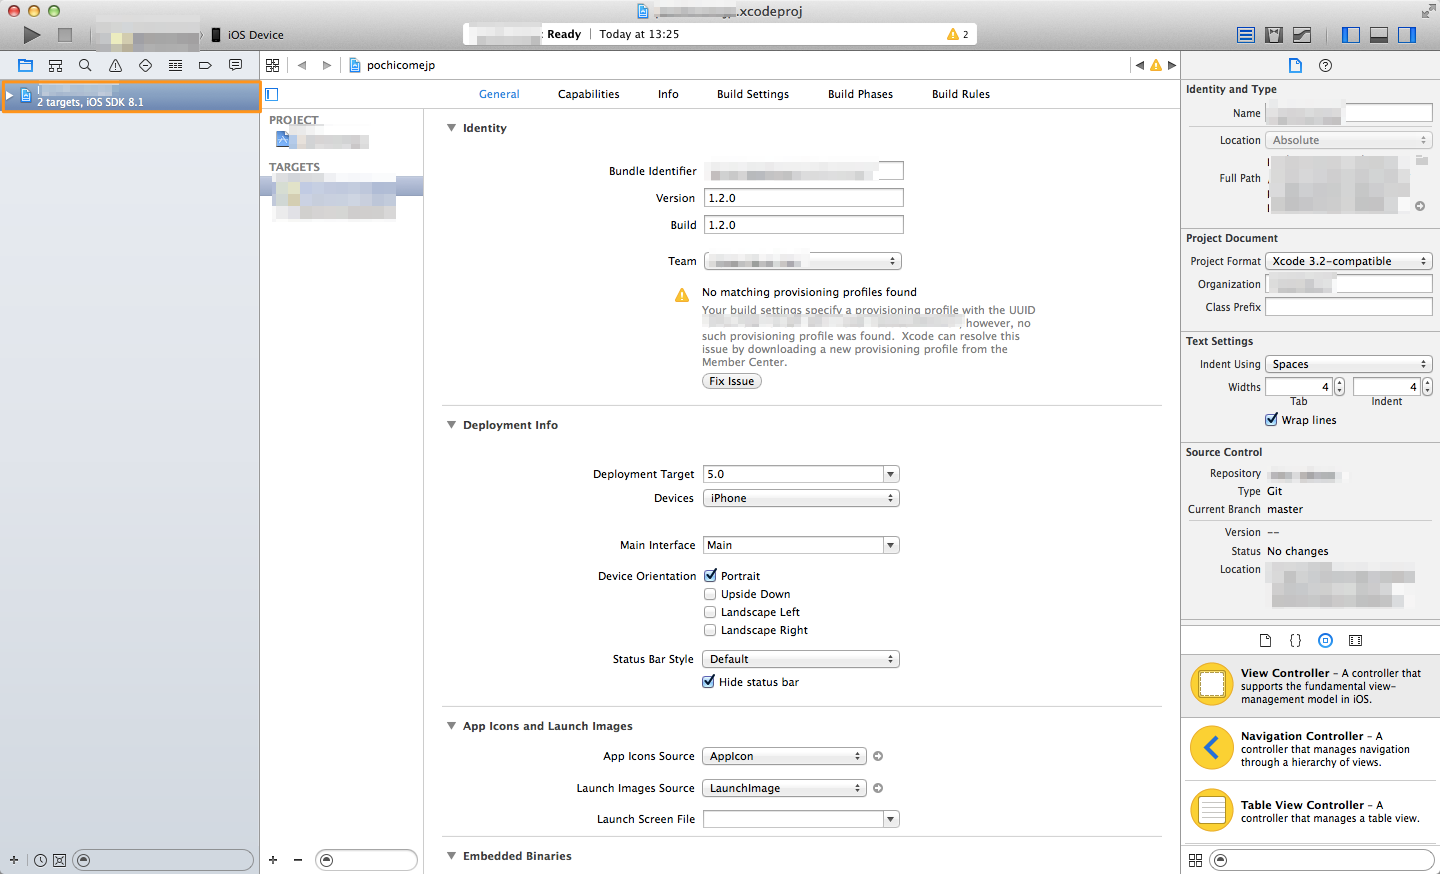
After opening the project, click the project route on the left.
A warning “no matching provisioning profiles found” is displayed. This is a warning that the specified provisioning profile does not exist.
The provisioning profile is a set of information on developers, applications, and terminals that can be used, and it is necessary to binaryize test applications using a terminal, publish an application store, and so on.
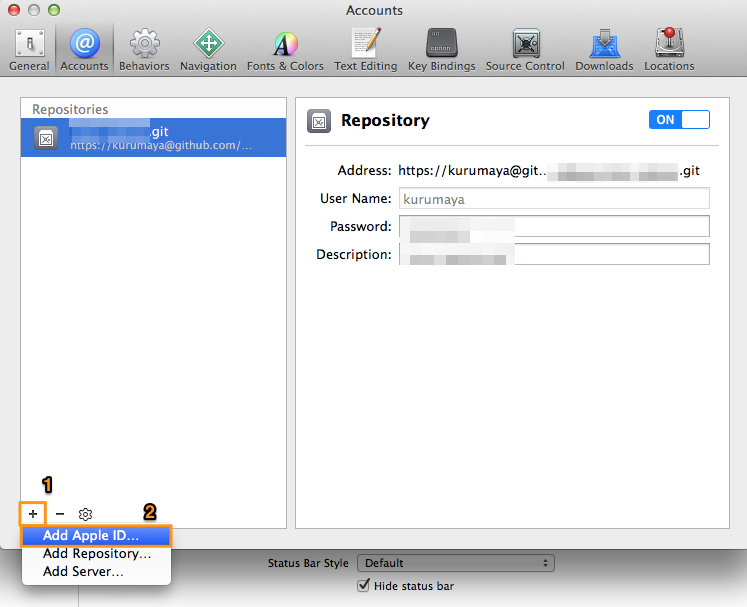
You manage the provisioning profile with Preferences & gt; Accounts. Please open it from the Xcode menu.
The checked out repository is displayed. I will add my own Apple ID here.
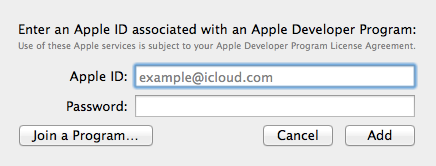
Please enter Apple ID registered in Apple Developer.
3. Prepare the provisioning profile for development
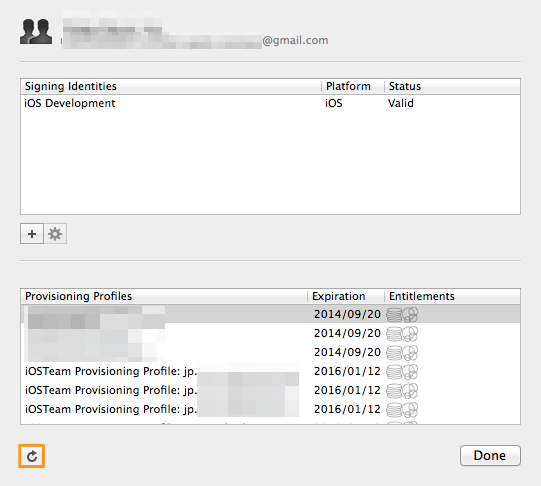
Select the added Apple ID and click “View Details …” in the lower right.
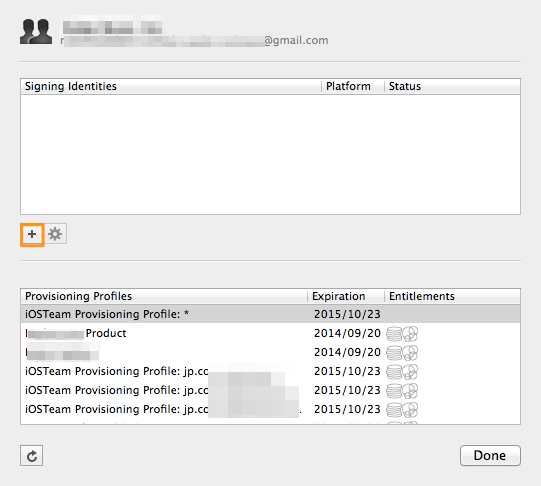
Account information has been displayed. Xcode manages the provisioning profile without downloading from Apple Developer.
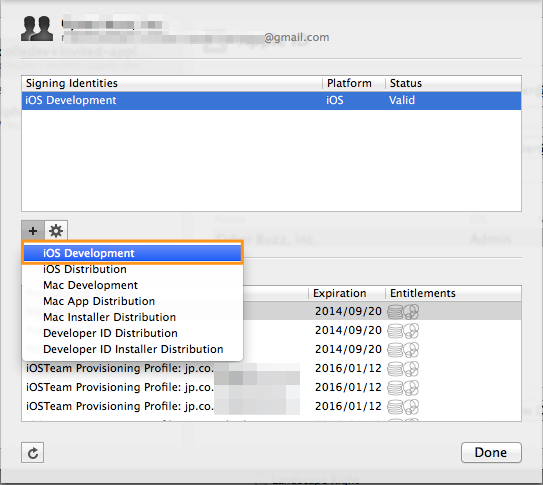
In the initial state, Signing Identities are pure white. This is Apple Developer’s “iOS Certificates“It cooperates with.
Click the + button to add “iOS Development”.
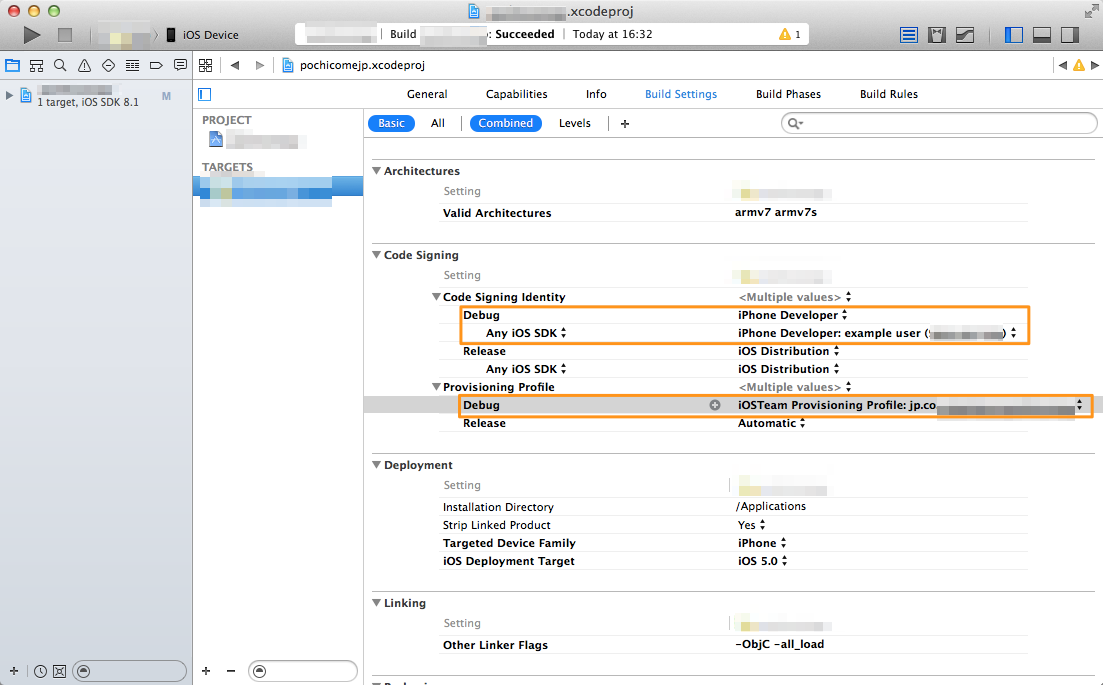
Open the project and set the Code Signing and Provisioning Profile for Build Settings. Select “iPhone Developer: User Name (ID)” for Code signing Identity and “iOS Team Provisioning Profile: Application Bundle Identifier” for Provisioning Profile.
If you can not find it, please proceed as it is. If it is a recently created application, it will be selected automatically so you do not need to set it.
Now you can test by actual machine.
Let’s connect the terminal to the USB and run it from the Run button on the upper left.
If it is displayed as above, the terminal may not be registered. Proceed to the next step.
4. Register the device for testing with Apple Developer
Copy the ID of the terminal to be added with Xcode
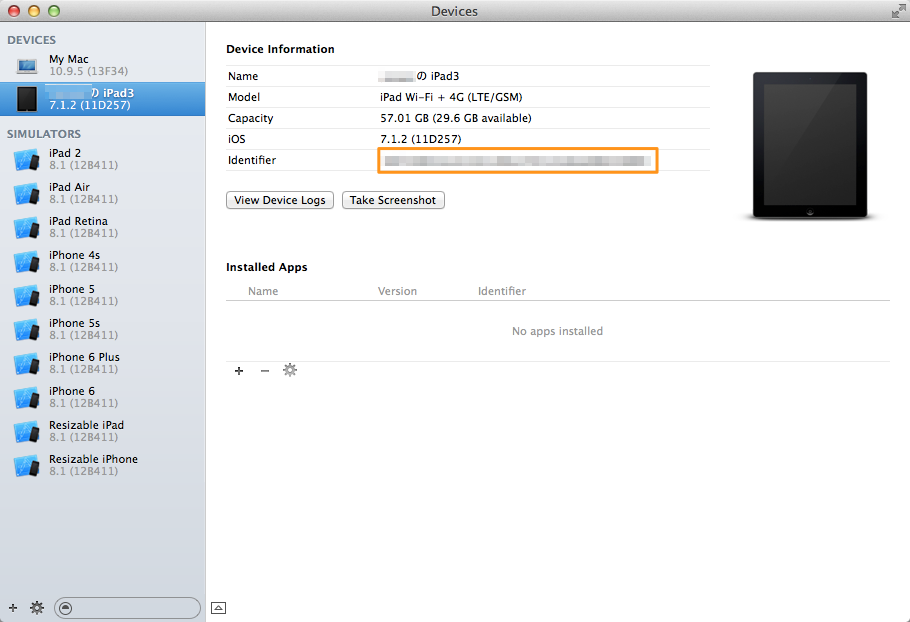
From the Xcode menu, select Window> Devices.
Please copy the Identifier of the connected terminal.
Add a device with Apple Developer
Log in to Apple Developer,Terminal management screenPlease open it.
Member Center & gt; Certificates, Identifiers & Profiles & gt; Devices.
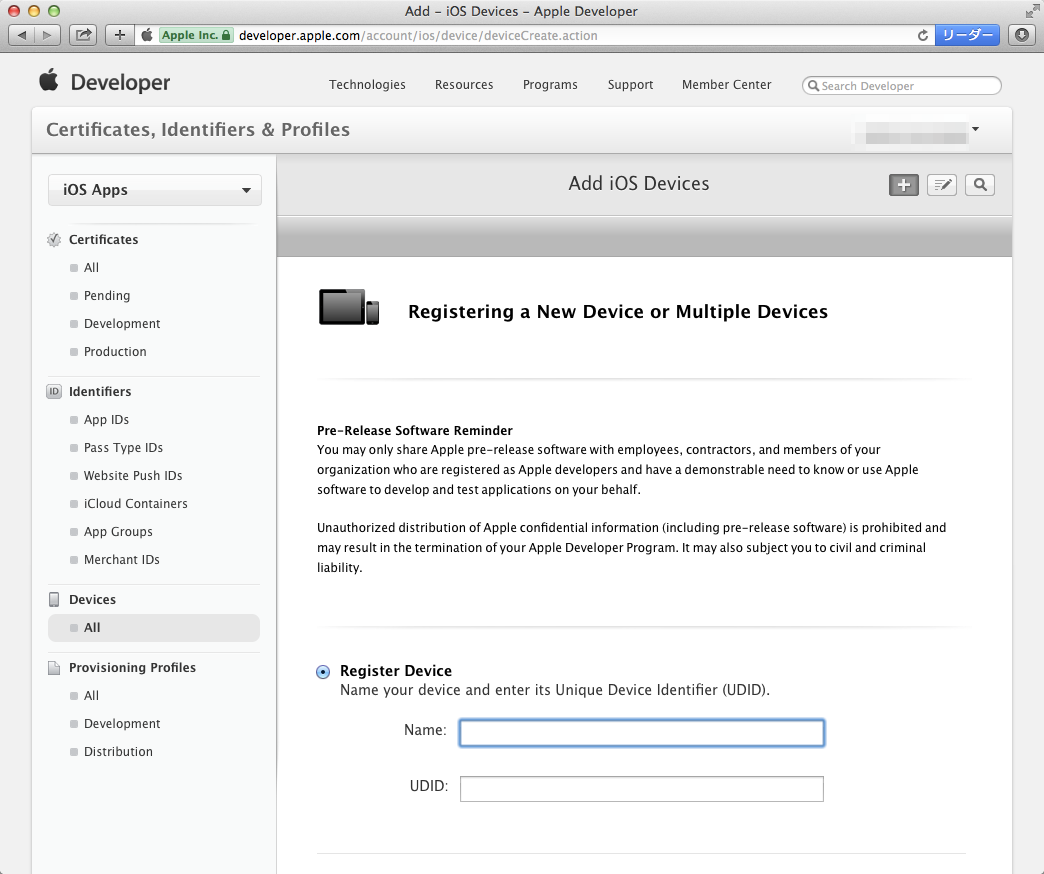
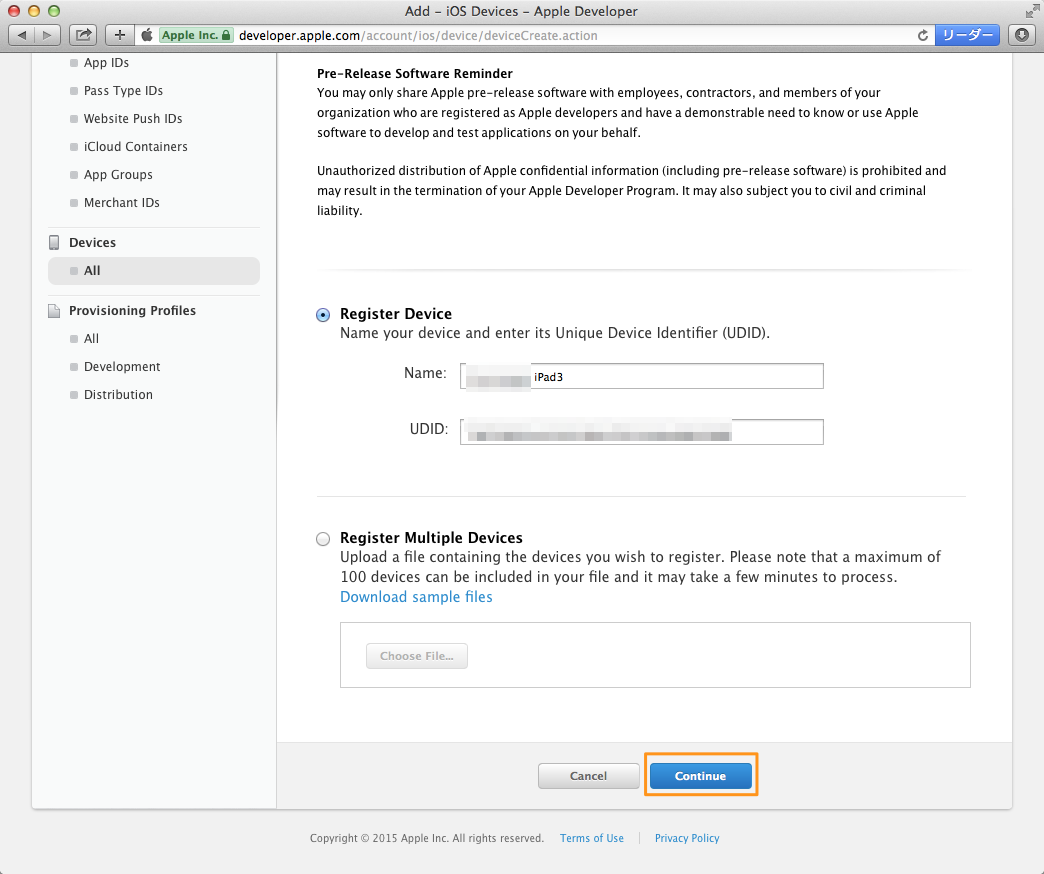
Press the + button to add a terminal.
Paste the Identifier of the terminal copied with Xcode to UDID earlier.
Name can be anything. For easier identification, let ‘s put it as the owner + model name of the terminal etc.
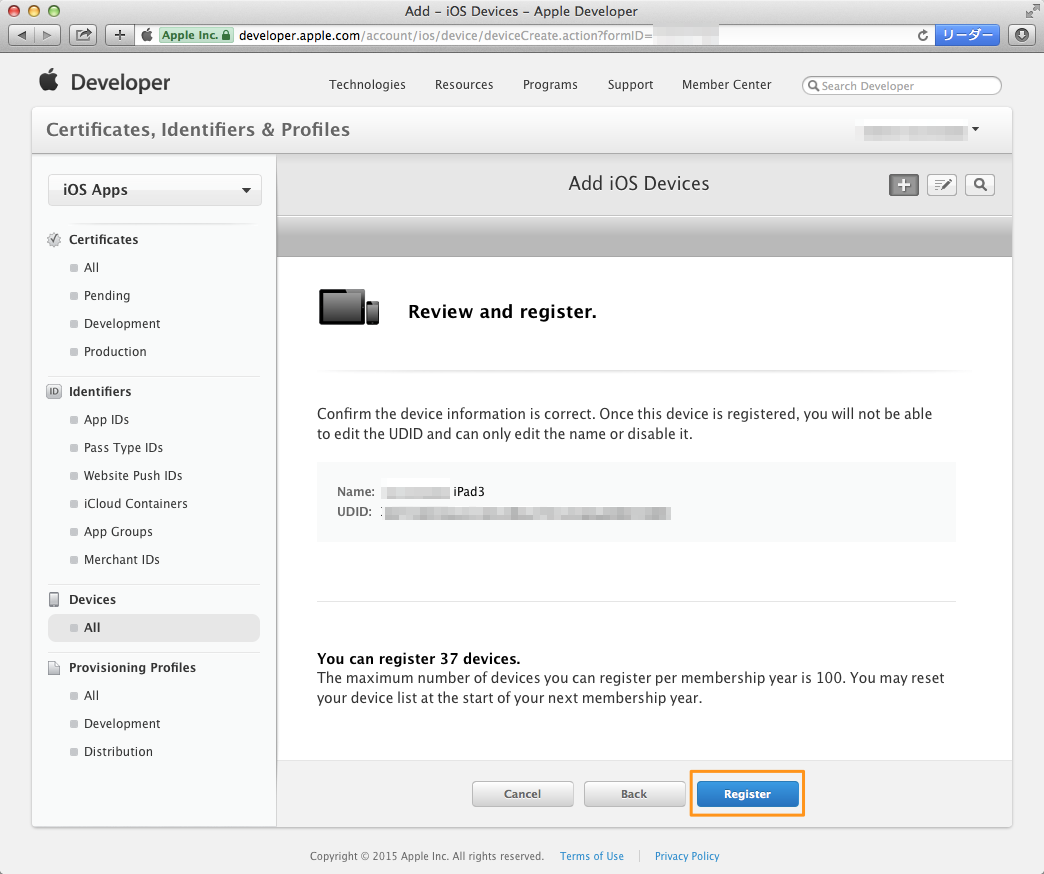
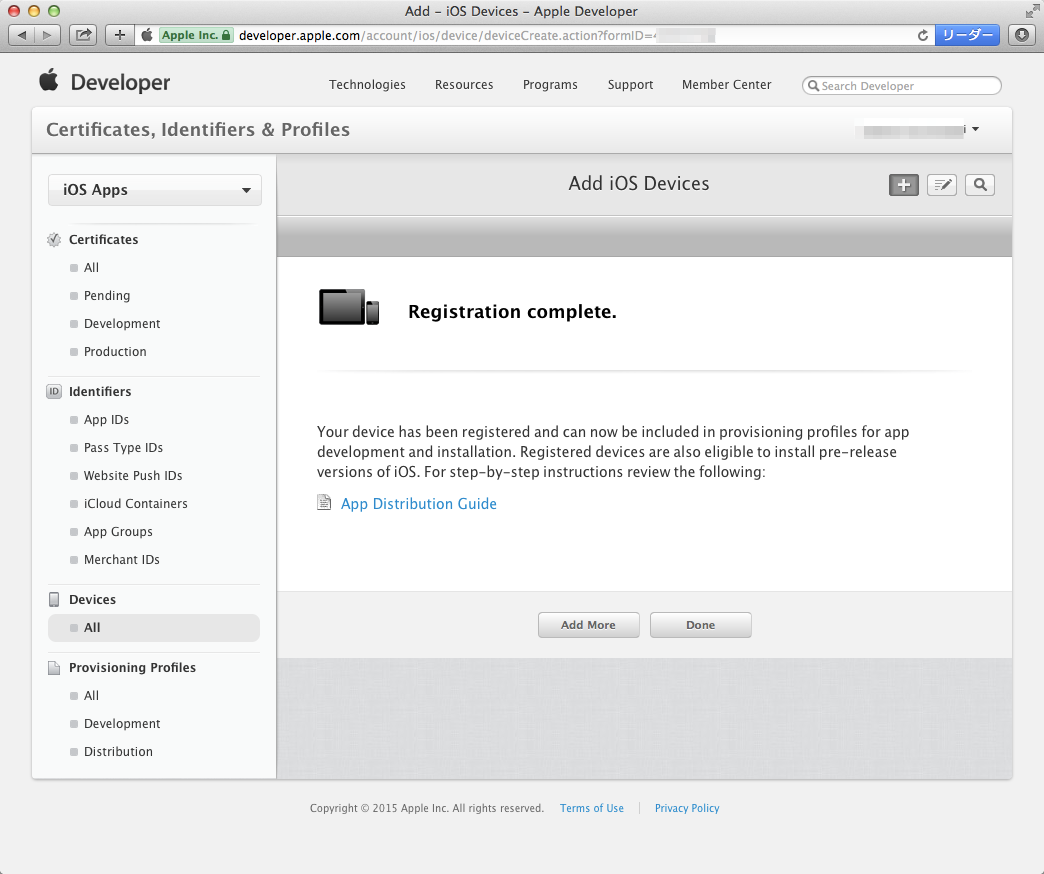
Please confirm whether UDID is correct and register.
trouble shooting
Please refer to it when terminal addition does not go well.
Update when terminal addition button is grayed out
If the + button is grayed out on the terminal management screen and it says “Reset your device list before adding any new devices.”, Please refer to the following page and reset the terminal information.
Device list update in iOS Dev Center
App installation failed even if you add a terminal
If it can not be executed with the same error, first update the provisioning profile from Xcode’s Preferences & gt; Accounts & gt; View Details ….
Once you disconnect the terminal from the USB and connect it again,
Please select the provisioning profile of Build Settings & gt; Code Signing and execute it.
- OS X 10.9.4 (Mavericks) or later is required. If you are using an earlier OS,Apple Developer download page(Login required) can be dropped. & nbsp;A
