This time Google Extension Plugin “Screencastify (Screen Video Recorder)We will explain how to use “.
How to use is very simple as long as you can set it for the first time!
Screencastify, to put it briefly,Plug-in to record PC screenis. As a convenient function of this, it is possible to record by specifying the tab of the browser. Of course internal sound is also batch re-recorded.
Let’s start from the addition of the extension plug-in at once.
How to add Screencastify
First of all, let’s access the Chrome Web Store.
When you access it,ScreencastifyPlease type in.

& nbsp;
When I scroll a little bit “Screencastify (Screen Video Recorder)As it comes out, let’s add the plugin to the browser by clicking on “Add to CHROME”.

& nbsp;
Once you have successfully added the plugin, an icon like a movie film will be added to the upper right of the browser.
Let’s click on this to do the initial setup.

Initial setting of Screencastify
When the installation is completed, start Screencastify and start up, the initial setting screen will come up.
First let’s set up a tab recording.

Click “SET TAB RECORDING” to finish.
& nbsp;
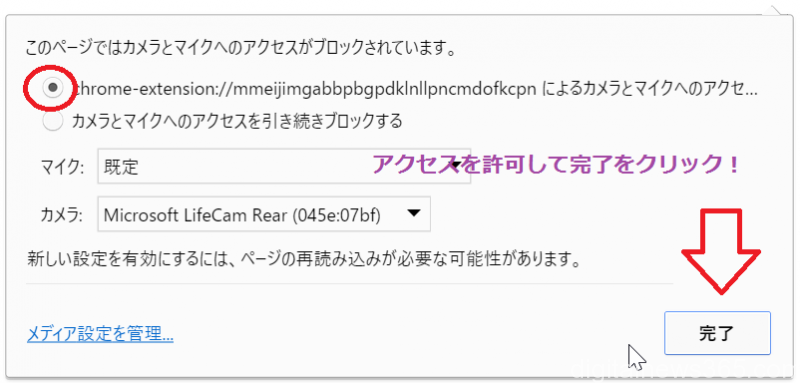
Next is camera setting.
Since you usually do not use a camera, you can just release the block and it’s ok.
Once all the settings are completed, you can proceed to the next detailed setting.

Detailed setting of Screencastify
Let’s set the settings for actually recording!
Please click the tab button and set as follows.

I will not use the web camera, so uncheck it. By default, I think that Microphone is checked, so please remove it. Audio is OK with Tab Audio only.
When you want to confirm the place you are recording in real time,Show preview windowLet’s check it. Because it is convenient for pause etc., I think that it was better to personally check it.
This completes the setting in one place! Thank you for your hard work!
After setting, open the tab you want to record and press “RECORD TAB“Please click on the!
& nbsp;
When preview is on, this screen will appear at the lower right of the screen.

If you pause with PAUSE, it will be recorded until the point where you paused. When resuming, recording will resume from the part currently playing on the screen. With this function,Cut the part you do not need during the broadcastI can do it easily.
Let’s stop recording.
When you stop recording, the screen will be as follows.

It is a simple edit screen.
It is the explanation of the button on the upper right, but this is from right.
- Trash can (discard video)
- trimming
- Share on SNS
- Save
- Regeneration
What you often use in this is trimming and saving. Trimming is to select the screen range you want to save yourself. If you can trim well, you can also cut the Screencastify Lite in the upper right.
Finally, when you click Save, you can download the file “〇 ◯ .webm”. This can be converted to MP4 with another software.
In addition, the paid version, the following restrictions that were included in the free version will be removed.
Details are introduced in this article together with a simple flow of the recording method, so please refer.
& nbsp;