I installed Redmine on my PC and tried Redmine and Git.
However, because Git’s Bare repository meaning was not known, Redmine got Git
I could not see the repository.
So record the procedure from installation to viewing the Git repository.
I would appreciate it if you can tell me if there is a simpler way.
environment
PC: Windows Virtual PC
OS: Windows 7 Ultimate SP 1
RM: Bitnami Redmine Stack 3.2.0-2
Goal
By installing Redmine on your PC and seeing Git’s repository, install
Confirm what you can do.
principle
It is easy to install using Bitnami’s program stack.
Redmine only git the repository initialized with Git’s “–bare” option
I can peek but I can not directly commit to that repository, so I cloned it
Push after committing to the local repository.
Details
1. Installing Bitnami Redmine
Bitnami’s page
Go to
Download for Windows.
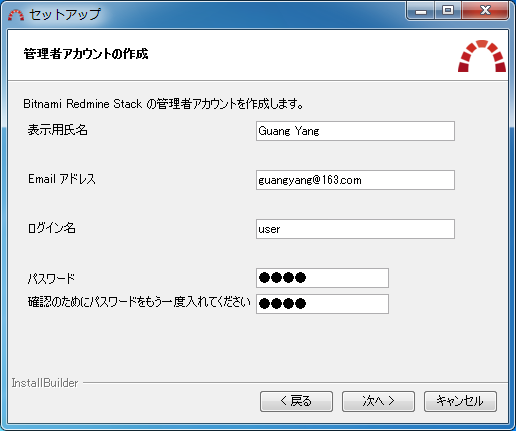
Execute the downloaded installation program.
Click “Next” several times to complete the installation.
The password you entered during installation will also be the MySQL root password,
I also used it later when I added backups and TestLink.
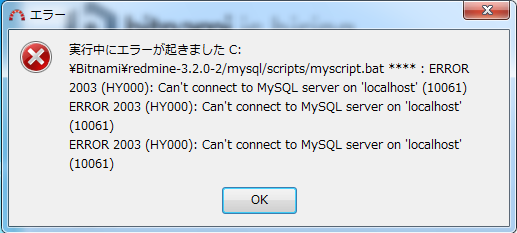
Since this kind of error occurred, change localhost to 127.0.0.1 on hosts and start over
Then it went well.
Some parts could not be displayed if Japanese was selected as the installation language before
That’s right, it’s improved.
Reference:Install Bitnami Redmine for Windows
2. View the Git repository
-1 Make a project and ticket to Redmine
Login to Redmine and project with “Project” → “New Project”
Make it. (Content is appropriate)
Make a ticket with “New Ticket”. (Content is appropriate)
→ I can create a ticket “# 1”
-2 Git creates repository for server and local repository and puts file
Windows “Start”, “All Programs”, “Bitnami Redmine Stack
Use “prompt”.

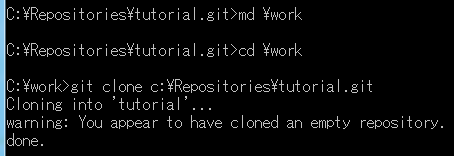
Make a folder “\ Repositories \ tutorial.git” for the Git server.

Create a repository for Git servers with “git init –bare”.

Create a folder “\ work” for Git local repository, under it
“Clone in” git clone \ Repositories \ tutorial.git “.
Make a test file.
(“Copy con: sample.txt”, contents are appropriate)
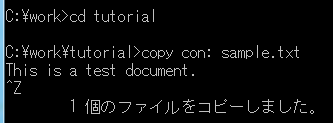
Add “sample.txt” to the index with “git add sample.txt”.

“Git config –global user.name” ◯◯ “” and
“Git config –global user.email” __# “” with
Register user name and mail address.
Since Redmine searches for user names and mail addresses from the Git repository,
It is necessary to register the user name and mail address registered in Redmine.

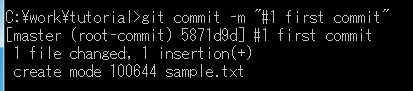
“Git commit – m” # 1 first commit “” to Git local repository
Add Redmine ticket number “# 1” to the annotation and commit.
“Git push orign master” to send to the Git server.
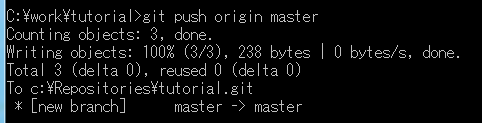
IIntroduction to Git to understand in monkeysI watched and practiced Git.
Remote repository is borrowed by initializing with “–bare” option
I could make it without it.
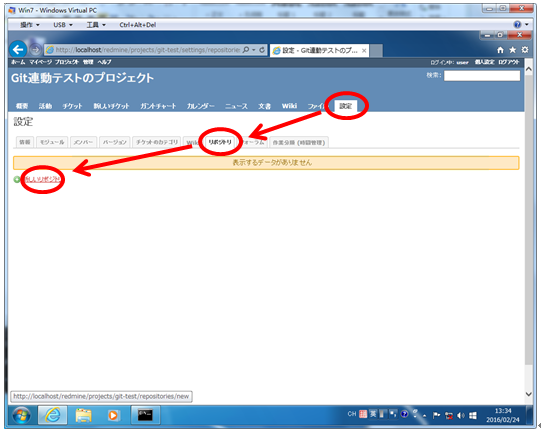
-3 Looking inside the repository for servers with Redmine
Open the project with Redmine, “Settings”, “Repository”, “New
Repository “to display the registration screen.
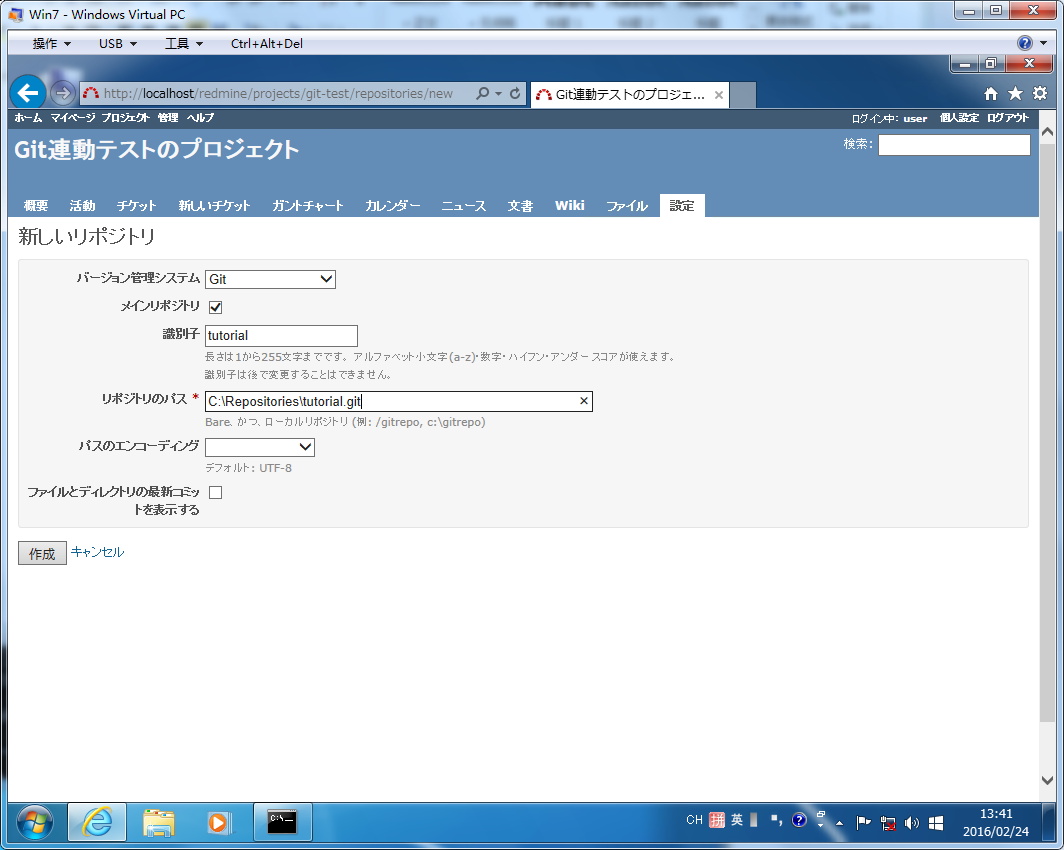
SCM: “Git”, identifier: “tutorial”, repository path: “C: \ Repositories \ tutorial.git”,
Then click “Create”.
When you click “Repository”, when you commit in Git local repository
You can see the comment.
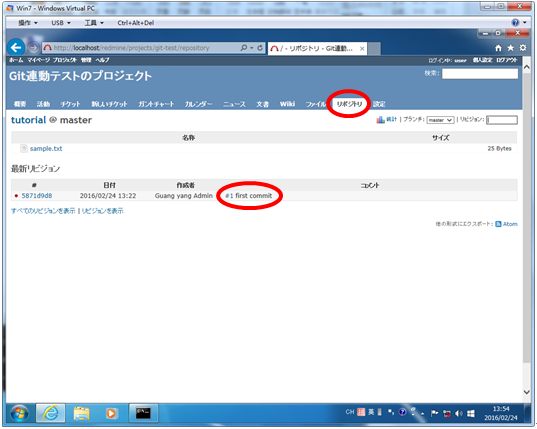
When you click “# 1” in the comment, Redmine displays ticket # 1.
that’s all